Wednesday 27 February 2013

Printing with Leaves and some simple Colour Mixing

We had a visit to our local community farm this week where we came across some amazing leaves. I love crafting with natural items and things that don't cost too much (especially when you are crafting every other day!). So today we did some leaf printing, it is super easy and very effective.


Here is what we started with, large leaves (I have no idea what type they are, but they had predominant veins which were great for printing), paint brushes, A3 paper (we just used copy paper) and poster paint in primary colours.
We painted the leaves vein side up using paint brushes and primary coloured paints.
Turned the leaves over and pressed them down onto the paper like a stamp to create the prints. 

Miss M making her first print.

Miss L covering her leaf with plenty of paint ready to print.

Master J very meticulous with the covering of his leaf.

Miss A being sure to press her leaf down firmly.

Miss L sneaky a peak at her print.

Miss A creating a great print.

Sticking to the primary colours made for lots of talk about colour mixing, we ended up with some purple, green and orange all made by experimenting!


Loving Master J's concentrating tongue. While he mixes up some green.


Master E working on some colour mixing and working out the red and yellow make orange.

Miss G working out that blue and yellow make green.

Miss O mixing up some purple.

One of our very clear prints.

A gorgeous example of some overlapping leaf printing, using yellow and blue to create green.


These prints turned out really well and look great. It was very simple and relatively mess free considering it was paint! We had lots of great discussions about colour mixing and the kids very proud of their works of art.
I think we will be on the hunt for some more leaves to try soon.

Monday 25 February 2013

Straw Printing

Straw Printing is a great way to paint with minimal mess. Although I don't mind mess, sometimes it is nice to keep it contained!
This was really simple, I cut the end of the straws to make four or five individual sections and then spread them out ready to dip into the paint and print away.


What we started with straws, card to print on and thick paint (we used crayola finger paint).

The straws were really easy for the children to grip and held the paint well.

Master J being very meticulous with his printing.

Miss G experimenting with spreading the paint using the straw.

Master E decided that hitting the straw down onto the page made a great effect.

Miss L busy printing.

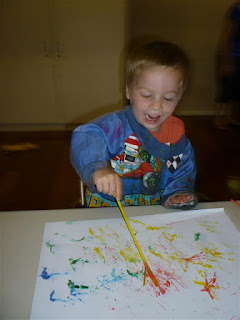
One of the finished Masterpieces, I love the way it resembles fireworks!

Sunday 24 February 2013

Threading with things from around the house


Craft doesn't always have to be complicated or messy. Sometimes it's nice just to make something really simple and with things you have lying around. It is still really hot here so today we were trying to have a fairly quiet afternoon in. Miss M and Master E are always keen to craft so this afternoon we got busy threading and creating some hanging decorations. 


We started with things I had lying around, coloured pasta left over from previous crafts, bottle tops, short lengths of straws, honeycomb mesh and some small patty pans.


I tied off a piece of coloured pasta to the end of some curling ribbon to form a stopper, we also used some child friendly plastic needles for the first time and these were a real hit.

It took awhile for Miss M to master pushing the needle through the patty pans, but  once she got the hang of it I couldn't stop her. This is great for building fine motor and hand eye coordination. 


Once our ribbon was full I tied it off around another piece of pasta to form another stopper.

Master E's finished masterpiece. 

Miss M's glorious creation.

Simple crafting at it's best. What simple crafts do you like to do? We would love to hear your ideas!

Wednesday 13 February 2013

Valentines Day Fine Motor Fun!

Valentine's Day is here, so here is a super cute and very easy Valentine's Day Heart Craft.
I pre cut some heart shapes out of some thick card, used a hole punch to make a hole and threaded some ribbon through to make a hanging decoration.  We then scrunched up pieces of coloured tissue paper and pasted them all over our heart's. Fabulous for developing our Fine Motor Skills.

Scrunching up the tissue paper. 


Master S ready to get gluing.
Miss L deep in thought.


Miss M working hard.


Master T proud of his heart and happy to pose for the camera!

Master E busy scrunching.


Miss A very proud of her heart.


Miss G also posing for the camera, everyone was keen for a photo today, must be the love in the air!

Miss A busy decorating her heart.

Finished and ready for hanging, now just to find a free space!


Tuesday 5 February 2013

Tape Resist Initial Canvases

I brought some dot painters awhile ago and have been looking for a good way to try them out when I came across a gorgeous post on Resist Painting on Happy Whimsical Hearts which had me thinking. I loved the idea of creating canvases for the Toddler Timers to put up in their rooms and using the Tape Resist Technique.
So here is our attempt at something very similar.

We used canvases that I grabbed from The Reject Shop, they had a four pack for $5 which I thought was a bargain.

I used some low tack masking tape to tape off a M for Miss M and an E for Master E.


Then I let them loose with the dot painters. These were fabulous as there was a controlled amount of paint coming out and no spills or real mess of any kind.


We quickly covered the canvases with dots and were keen to do some more painting so I left Master E and Miss M to freely cover the 2 spare canvases in any way they wished.


Once the canvases had dried I carefully removed the tape to reveal their initials. The results look amazing and Master E and Miss M are keen to have them up in their rooms.

Monday 4 February 2013

Our Top 20 Toddler Books

For awhile now I have been saying that I would add a post about favourite Toddler Books so here it is.
In no specific order these are the favourite books at our place, the ones that get read night after night and are really starting to look tatty.


  1. Where is the Green Sheep ~ Mem Fox
  2. The Very Hungry Caterpillar ~ Eric Carle
  3. Hairy Maclary ~ Lynley Dodd
  4. We're Going on a Bear Hunt ~ Michael Rosen and Helen Oxenbury
  5. There's a Hippopotamus on our Roof Eating Cake ~ Hazel Edwards
  6. Dear Zoo ~ Rod Campbell
  7. Goldilocks and the Three Bears ~ Little Golden Book
  8. Kisses for Daddy ~ Frances Watts and David Legge
  9. Are You My Mother ~ P.D. Eastman
  10. Where the Wild Things Are ~ Maurice Sendak
  11. Edward the Emu ~ Sheena Knowles
  12. Guess How Much I Love You ~ Sam McBrantley
  13. The Eye Book ~ Dr. Seuss
  14. Everybody Poos ~ Tara Gomi
  15. Each Peach Pear Plum ~ Janet and Allan Ahlberg
  16. Ten Little Fingers and Ten Little Toes ~ Mem Fox
  17. Mr McGee and the Big Bag of Bread ~ Pamela Allen
  18. The Foot Book ~ Dr. Seuss
  19. The Three Billy Goats Gruff ~ David Glover
  20. My Dad ~ Anthony Brown

What are your favourites? We love to hear them!